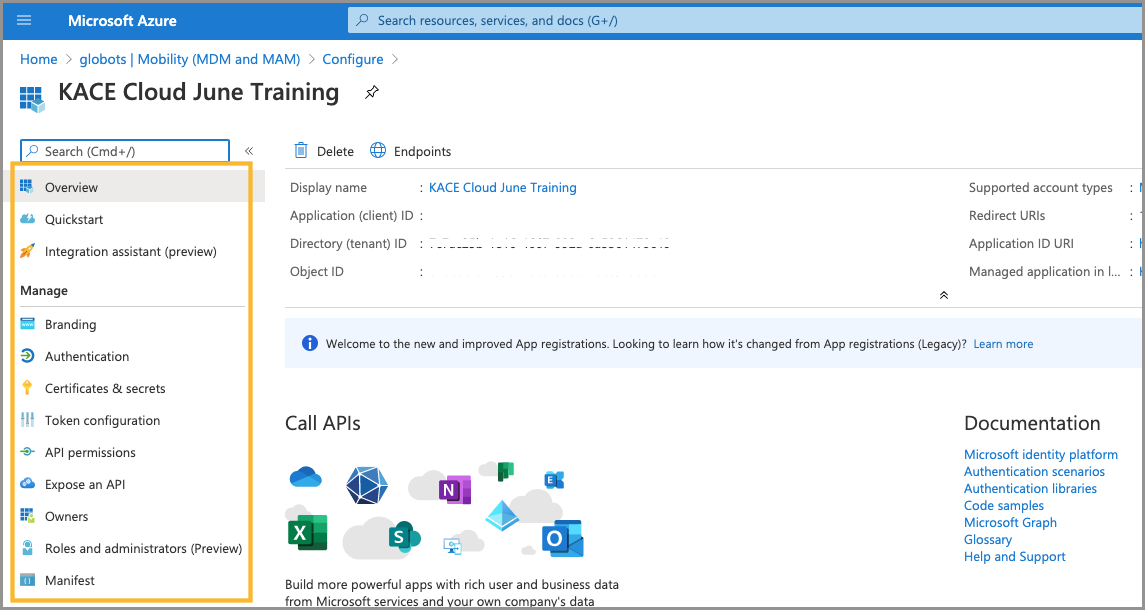
Manually connect Azure AD and KACE Cloud
This topic describes the manual process of connecting your Azure AD subscription with KACE Cloud. This is an alternative to using the automated process. While both flows result in the same outcome, it is always recommended to use the automated flow. For details, see Automatically connect Azure AD and KACE Cloud.
To add KACE Cloud app to Azure AD:
- Ensure that you have all of the mandatory Azure AD pre-requisites in place before you establish a connection to your Azure AD environment.
- Log in to Azure AD.
- Go to Mobility (MDM and MAM).
- Click + Add application to add KACE Cloud app.
- Locate and select On-Premises MDM application.
- In right panel, rename the app to 'KACE Cloud', then click Add.
The app will now show up in the main Mobility (MDM and MAM) list.
To get started with creating a manual configuration in KACE Cloud:
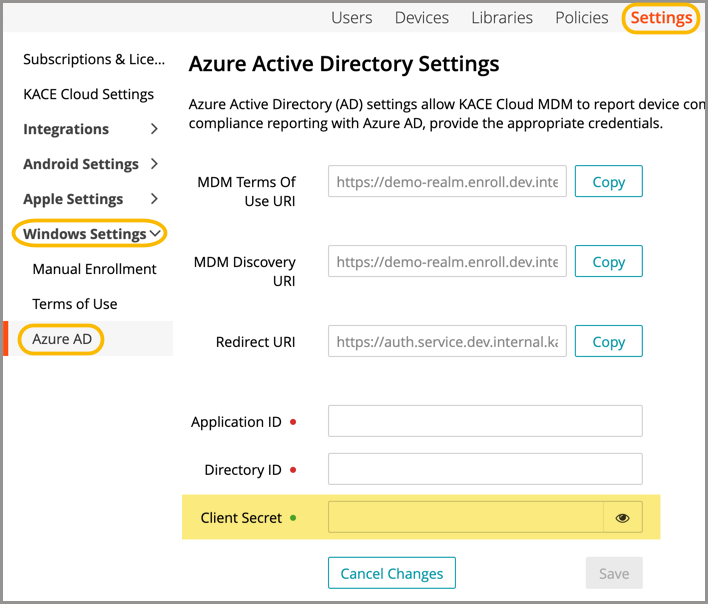
- In KACE Cloud, go to Settings > Windows Settings > Azure AD.
- On the Azure Active Directory Settings page, start the Manual process.
- If you do not currently have a configuration for the previously offered on-premise KACE Cloud solution, click Manual.
- If you already have an on-premise KACE Cloud solution, and want to create a new one, click Remove Existing Settings, and then click Manual.
To configure KACE Cloud app in Azure AD:
- In Mobility (MDM and MAM), open the KACE Cloud app.
- Set MDM user scope to All.
-
Create Terms of Use in KACE Cloud.
- In KACE Cloud, go to Settings > Windows Settings > Terms of Use.
- Click Add New, and in the Edit Terms Of Use view that appears, provide required information. Then, click Save.
- Configure the MDM Terms Of Use URI and MDM Discovery URI values.
- In KACE Cloud, go to Settings > Windows Settings > Azure AD.
- On the Azure Active Directory Settings page, locate the MDM Terms Of Use URI field, and click Copy.
- In Azure AD, paste the contents in to the MDM Terms Of Use URL field.
- In KACE Cloud, on the Azure Active Directory Settings page, locate the MDM Discovery URI field, and click Copy.
- In Azure AD, paste the contents in to the MDM Discovery URL field, and click Save. Then click the On-premises MDM application settings link.
To continue with this configuration, we move down the left navigation on the main page of Azure AD.
To configure branding elements:
- In left navigation, click Branding.
- Upload your logo and paste in your terms of use or privacy statement.
- Click Save.
To configure authentication:
- In left navigation, click Authentication.
- Click Add Platform.
- Choose Web.
- In KACE Cloud, go to Settings > Windows Settings > Azure AD.
- On the Azure Active Directory Settings page, locate the Redirect URI field, and click Copy.
- In Azure AD, in the Redirect URIs section, paste the contents of the Redirect URI field from KACE Cloud. Then click Configure.
Adding a platform is part of the SSO setup process, so we can complete both of these tasks now.
A Redirect URI is used to connect the KACE Cloud Admin Portal to Azure AD.
.png)
Modify API permissions
API permissions give KACE Cloud the ability to modify some of the properties inside of Azure AD—for example: device status.
- In left navigation, click API Permissions.
- Click Add Permission.
- Choose Microsoft Graph.
- Click Application Permissions, then scroll to Device Group in the list.
- Check Device.ReadWrite.All, then click Add Permission.
.png)
While still in Microsoft Graph:
- Click Delegated Permission.
- This ensures that the API will behave as if it's the signed-in user.
- Under Permission, check email, openid, and profile.
- Click Add Permission.
Review and Grant All Permissions:
- Review each status for the green 'Granted for [tenant]' icon.
- Locate missing status for api/permission name.
- Click Grant admin consent for [tenant].
- Click Yes to approve.
- This action will grant all permissions for the app.
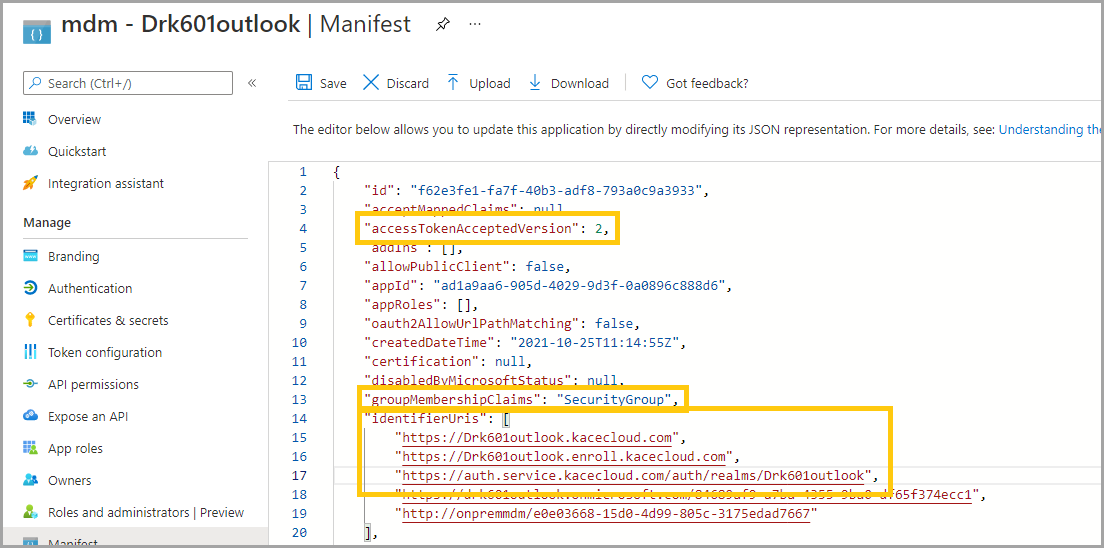
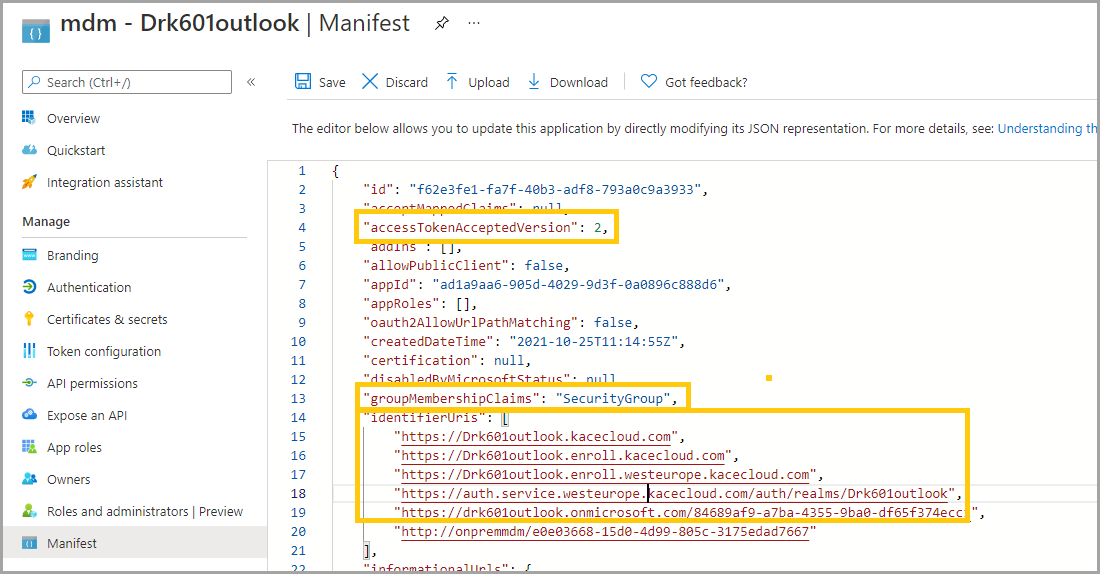
Manifest:
- Set "groupMembershipClaims" to "All" or "SecurityGroup".
- Set "accessTokenAcceptedVersion" to 2.
- Add the following URI's to the "identifierUris" list:
- If provisioned in the US datacenter:
- "https://[tenant].kacecloud.com",
- "https://[tenant].enroll.kacecloud.com",
- "https://auth.service.kacecloud.com/auth/realms/[tenant]",
- If provisioned in the datacenter in Europe:
- "https://[tenant].kacecloud.com",
- "https://[tenant].enroll.kacecloud.com",
- "https://[tenant].enroll.westeurope.kacecloud.com",
- "https://auth.service.westeurope.kacecloud.com/auth/realms/[tenant]",
- If provisioned in the US datacenter:
- Click Save.
Confirm the placement of quotes around each identifier and a comma after each line.
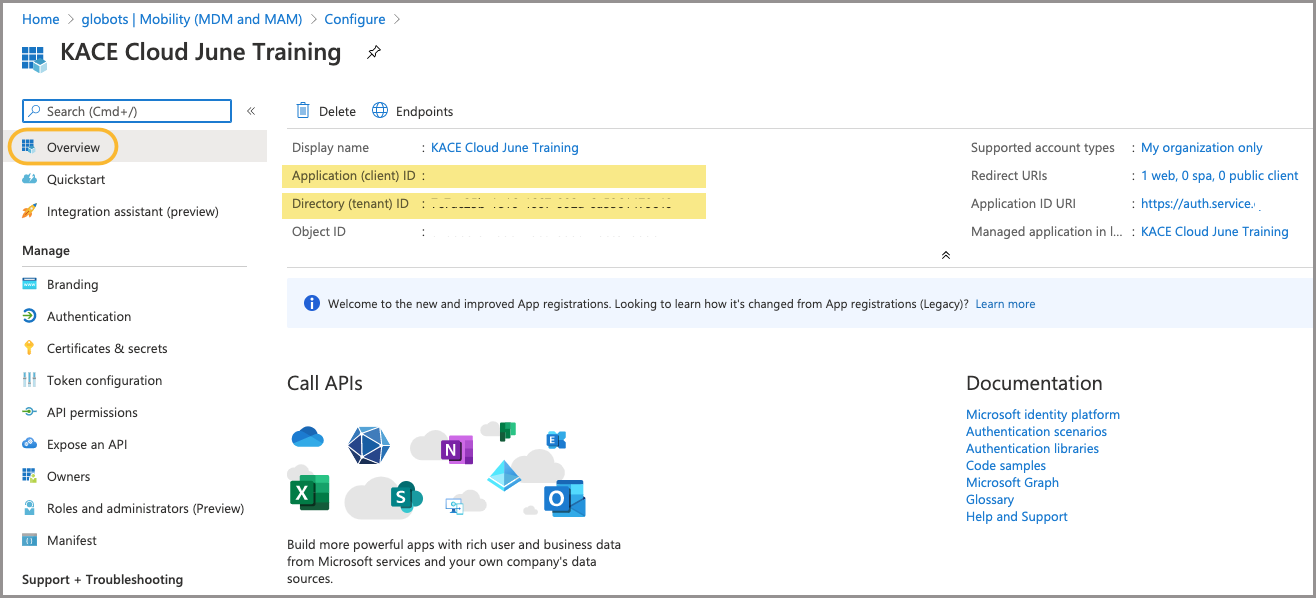
Configure Azure AD Settings
In the Mobility (MDM and MAM) section:
- Select the new KACE Cloud application.
- Click On-premises MDM application settings.
In Azure AD, in the Overview section:
- Copy the Application (client) ID.
- Copy the Directory (tenant) ID.
In KACE Cloud:
- Go to Settings > Windows Settings > Azure AD Settings.
- Paste the Application (client) ID copied from Azure AD.
- Paste the Directory (tenant) ID copied from Azure AD.
.png)
In Azure AD:
- Open Certificates & Secrets in left navigation.
- Create a new client secret.
- Copy the value that is generated.
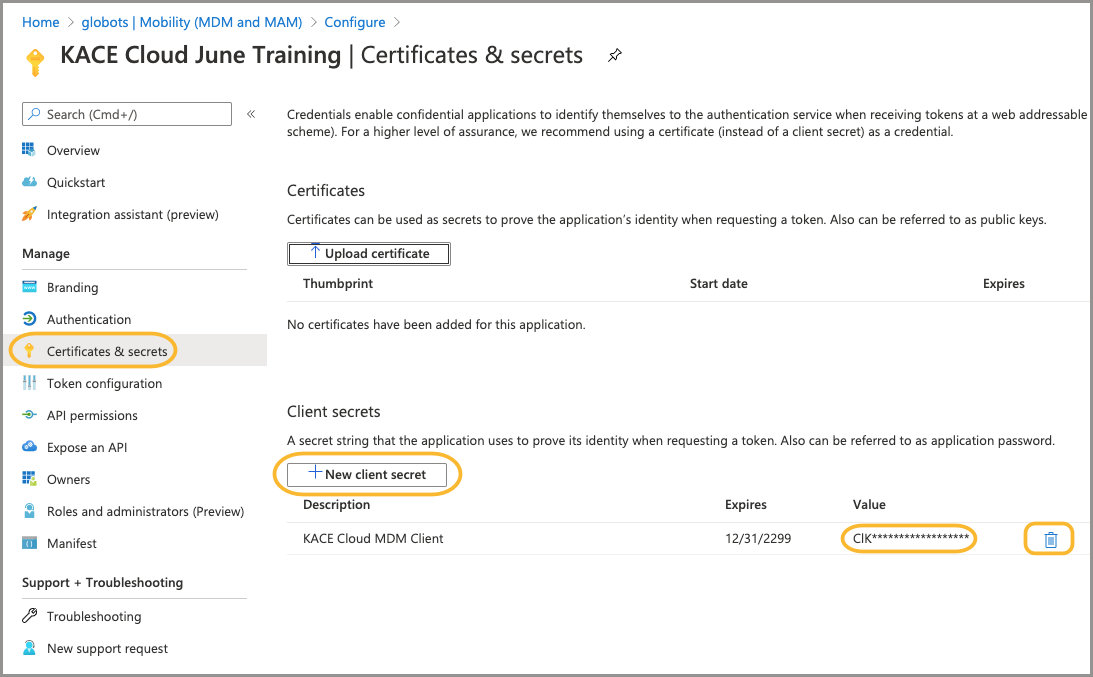
In KACE Cloud:
- Paste the Client Secret value into the Client Secret field.
- Click Save.
- This will be the first attempt to verify the credentials.
- If the attempt is successful, the credentials will be saved.
Configure SSO
Follow these instructions if SSO has never been configured.
In KACE Cloud:
- Go to Settings > Integrations > Single Sign-On (SSO).
- Select SAML to open the SSO Wizard.
In Azure AD:
- Select the KACE Cloud app registration.
- In the Overview section, click the Endpoints button.
- Copy the Federation Metadata Document link.
.png)
In KACE Cloud:
- Paste the Federation Metadata Document link into Import from URL field.
- Click Import.

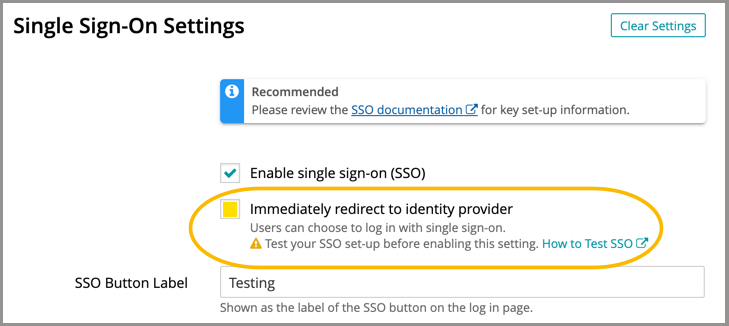
In the SSO Wizard:
- Click the 'Enable SSO' checkbox, then click Save Settings at the bottom of the screen.
- This will accept all the default settings—consult the documentation if you want to customize.
- Test the success of SSO. See Configuring Single Sign-On.
- If SSO setup is successful, check 'Immediately redirect to identity provider' and Save Settings.
Next steps
Azure AD domains
Hybrid AD domains
- New devices
- Azure AD domains: Use Windows Autopilot to join devices.
- Existing devices: Add target devices to hybrid Azure AD domains.
- Review additional functions for enrolled Windows devices.